Friday, September 3, 2010

Scripts Tag Sale

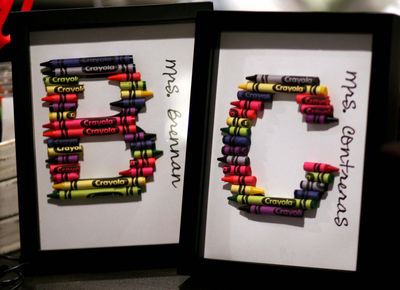
I have been going through all the older Scripts kits and some of the VERY cool things that never made it into a kit!! Wow, there is quite a few AWESOME things left!
I decided to stop Scripts back in the Spring. There were a lot of reasons behind it. Mostly just too much time and too little money!
We are selling our house and I have been cleaning out the closets! I have a ridiculous amount of stuff....as you probably can relate!!

I have put together a kit that will include a 12x12 American Crafts album. I only have a few of these kits. I'm sure they will go really fast! I have a picture of the entire kit. Everything you see will be included. Most items are from CHA winter 2010. I am confident that you can finish a complete album with this product and have so much left over!! I do have a few "extra" things that will be included, too!

This kit would retail for over $150.00!!!
I am offering it to you for $80.00......

This kit will be shipping next week.
I have everything in stock and will box it up as soon as it's paid for!


Email me with your order and I will send you an invoice through Paypal. As usual, email with any questions!!

thank so much!
Lucy

Tuesday, June 22, 2010

Rayovac Contest

Hey, friends, I thought you might want to know about this awesome summer promotion!

"The first 99 bloggers to promote the Rayovac Powers Your Summer Twitter Event won a prize package from Rayovac."

Here's the link:
http://www.facebook.com/Rayovac

Monday, May 17, 2010

It's that time of year

School is almost over - we have two more weeks. My son's elementary school doesn't really do anything big for Teacher Appreciation, which I think stinks. I know they had a duty free lunch one day - meaning they get to eat out of the cafeteria and someone else watches the kids. But that's it. At least, that's all I know of. The past two schools he's attended had great plans for the week of teacher appreciation with themes each day and just fun for the teachers.

Since our school doesn't do a big deal, I just let it slide, planning on really kicking it up for the end of the year party. Our party is Friday and I've got one gift almost finished!! I've got to get on the ball! Here are some ideas that I really love and hopefully will try a few:

Crayon Monogram:


I would love to do this and have a stockpile of crayons, so I think it's doable! I've seen it with colored pencils, too - which is a great look, but I think I can cut crayons easier than the pencils.

The coolest clipboard ever:


Now, I've done a few altered clipboards in my day (every teacher has gotten at least one) but this one is so cool - with the cork and the clothes pins, and post its - you can't go wrong! I may try this for sure.

This one may be my favorite - a box of teacher goodies:


and check out the inside:


I just love this - I'm really going to try to remember to look at supplies for more of these, once school's back in and supplies get clearanced. But for now, I'll scope out some less expensive places and see what I can find - I'm a frugal girl, ya know!!

So, what are you doing for end of the year gifts?

lisa

Wednesday, May 12, 2010

My boy!


My son is now at the end of second grade, and I wanted to record some facts about him on a layout. The picture I used is perfect- it is his spring school picture, but he also has on an armful of animal bracelets. He has been ALL about them this year! He has too many to count, and spends any money he gets on them. He also loves his dad, paper airplanes, reading and the trampoline. I hope he looks back on this page one day and is reminded of what a cool second grader he was!

Monday, May 10, 2010

The April kit came along just in time.............

for this sweet picture of my new niece!


As soon as I dug into my kit, I was thinking about the baby pictures I would have soon of a sweet little baby girl. Seriously, as soon as I snapped this picture, I knew it would be the one I wanted to use on a layout. This came together really quickly and easily - I actually just did this during a break at school, while subbing. The kids were at P.E. so I spread out my stuff and got to work!


I used the Glimmer Mist on the letters to take away a bit of the iridescence and tone them down a bit. First I used a number 9 to test on, since there were enough 6's in case I needed a 9 at some point. I didn't think it was enough coverage so when I pulled my letters off for my title, I placed them on a paper towel and sprayed. Once they were dry, I sprayed a second coat to get a darker shade. They were perfect in the end!! I added the dangling charm from a previous kit, everything else is April's!!


Thanks for looking!
What did you do with your April kit?

Lisa

Saturday, May 8, 2010

Another layout to share

This layout is from the March kit. Cole had a field trip to the McWane Science Center and I got to go along. I took a million pictures of course - these are the highlights:


Thanks for looking!

Wednesday, May 5, 2010

Cards for Mom

Mother's day is around the corner, so I need to get some cards in the mail! I made these two this afternoon, and plan to make a few more for some other ladies in my life who aren't my mom, but hold a special place in my heart. I crinkled the cream ribbon up on doubled sided tape to add texture on the card on the left, and used a stamp pad on the white glitter thickers on the card on the right.


Monday, May 3, 2010

Mother's Day is right around the corner

I don't have any kit projects to share today but I did want to share some great Mother's Day craft ideas. I hope you see something you could easily make for the mom in your life or just for yourself because it's so darn cute!

This is one project I'm making for myself, as well as my mother-in-law and mom. For my mom, I'm thinking about doing a G and Grammy instead of the last name and the EST. date would be the year Cole was born. I'm thinking it would make a great wedding gift, too:


The information to put this together is here: Fireflies and Jellybeans

Here's another fun thing to make:


And the how-to's are here: Living with Lindsey
I've also seen a tutorial for making one of these with coffee filters!

This would be a really sweet pin for any mom or grandmom, or a really cute flower for a scrapbook page:


The directions for this can be found here: Under the Table and Dreaming

And this just may be my favorite - I am planning on doing this sometime this week. Maybe for my mom and definitely for me:


Here's the info on this fabulous project: Tatertots and Jello

All of these website are in my Google reader and are really great for fun projects, most that are super easy to do.

I hope your Mother's Day crafting will be fun and successful!!
Lisa

Wednesday, April 28, 2010

Can you hear it?

She makes my heart sing.....
My beautiful Hannah. I choose this title for two, no, three reasons.
1. She does make my heart sing!
2. She loves to sing!!
3. The cool music sheet paper by "Dear Lizzie"!


I LOVED the glimmer mist. So much so that I got a little carried away. I used a little too much. I was upset that I failed to realize that my stamped butterfly should have been stamped after I used the Glimmer Mist, or stamped in a permanent ink. But as the day past, it grew on me, and now I like it! I made the flowers using the cool fabric self adhesive paper- I just cut it into thin strips and wound it around in a circle . The pearls are from my stash.
I hope you all are enjoying the kit-- can't go wrong with Glimmer mist, thickers and stamps!

Monday, April 26, 2010

Sweet baby girl is on the way

My sister-in-law is scheduled to be induced this coming Monday - I was so excited to hear the news today - I made this.

Used the April kit and added some Dear Lizzy ribbon!


This tin bucket was in the Easter stuff at Hobby Lobby 90% off - quite a deal and a perfect match for this kit!

lisa

Tuesday, April 20, 2010

Here are my flowers

Completely forgot last night to do this - so I snapped a quick picture with my phone - it's not the best, but you get the idea:


In this first shot, you can see all the different sizes of circles and scallops I punched. Then i took my Dremel and filed the edges - this is so so much faster than using sandpaper or files and it's a little more precise when you need to get into small edges (like where two scallops meet).

These are my flowers:


I'm not finished with them - I need to add something to the centers, but you get the idea! I just crumpled them up, stacked them, snipped a little here and there and stapled. Whatever I add to the center will cover the staple! There you have it!

later!
lisa

Sunday, April 18, 2010

Punches are my favorite tool, how about you?


I love punches - border punches, corner punches, shape punches - all of them. I have a project I'm working on now and wanted to punch a few different size circle. I know I can use my Slice, but there's just something about a punch - I can't resist. And with the Slice, everything is cut in half inch increments and I wanted a different variation.

I headed to JoAnn's first, hoping to find a round punch that was a little less than 2 inches, plus I had a 50% off coupon. They didn't have one but the punches were on sale so I looked around hoping to find a new border punch - but they didn't have anything I was crazy about. I knew Michael's would have one, but didn't have my coupon with me and wasn't sure if they were on sale or not so to Hobby Lobby I went. Most of my punches have come from Hobby Lobby - so I felt they would have just what I was looking for. I also noticed a few Martha Stewart border punches at Hobby Lobby and this was a surprise, didn't think they would ever carry her stuff.

Let me tell you about my punches for a moment. I have Marvy punches, Paper Studio punches, Fiskars, Martha Stewart, and EK Success punches. I'm an equal opportunity puncher!! My favorite punches tend to be the border punches from Fiskars and then EK Success. I haven't had a problem with any of my Fiskars border punches and I use them lots. In my recent clean up of my scrap stuff I finally located one I'd been missing (apron lace) and was super excited to see it!!

I love my Paper Studio punches, but they tend to be really hard to punch with. I have these two that I've used a lot - they are scalloped circles - one is 2 5/16ths and then 1 7/8ths. These two are perfect for layering together but they are super hard to punch. I've tried aluminum foil and wax paper and neither help. I have to punch them on the floor and step on them (not the best method) or go to my kitchen counter top and punch there.

I was hoping to find a circle that would fit somewhere in between those two scallops. I ended up with a 1 7/16th circle punch - doesn't fit in between but I liked that size. I immediately opened it when I got home Saturday and started gathering my paper for my project.

One of the features of these punches (as well as the Marvy punches) is there is a clear cover on the area where your punched shape falls out - so you can see what you are punching, but it stays contained, in the punch. The bad thing is if you are lining up your paper and want the pattern just right in the punch, you have to take the cover off and take out the previously punched shape. My two scalloped circle punches have the clear cover removed and I'm pretty sure they are lost forever. I can see where this would be a great feature if you are punching a shape multiple times since it contains them all right there - no worries about them falling out or getting stuck. But with those particular punches, I haven't found it was that helpful to me. The coolest part of this new punch is the cover is clear and there's a slot that your shape can fall out of - so you can see where you are punching and then slip the shape out without having to take off that cover. I love it!! Best new feature of a punch ever!!

I got a little crazy and punched more circles than I needed, but hey - that's okay - I'll find a way to use them I'm sure!! While I was out hunting down the perfect circle punch, I ran in Tuesday Morning and found some Martha Stewart punches there. I only got one and it's odd - sort of a flower or medallion - not sure what it's supposed to be but for $2.99, I'll try it out. I haven't taken it out of the bag yet, but will get to it this week, I'm sure!!

So, what are your favorite punches? Do you have any fun tips or tricks to share? I'll be back next week with a few tips to share - I love taking a punch and using it to make something other than the shape intended!! Always love a challenge!! I'll try to come back later today and show you the flowers I made with my circles!!

Thanks for reading and leave me a comment about your favorite punch or tip!!

Wednesday, April 14, 2010

Altered Cubes


A long time ago, my son got this game in his kid's meal from Arby's. He didn't really want it and couldn't swap it for ice cream like you can at Chick-fil-a, so I took it! I just knew what I would do with it. Now, finally, I got around to altering it. I think I have 3 more, and may alter one for my Mom for Mother's Day, which will be here before I know it.

Here are some pics of the final product. I think it turned out well. The only problem I had was trying to keep my embellishments flat so the cubes would stack right!


As I look at these pictures, I realize that first, the bottom two cubes are backwards.... they should say "of my {kids}!" Sorry about that :). Second thing I noticed is that we are in restaurants in most of these pics! Maybe we eat out too much....

Monday, April 12, 2010

The third and Final (with distressing courtesy of my kids)


Sorry I'm late with this post. My layout was stolen and I couldn't find it. It finally turned up under a pile of pillows in the play room. It was also kind of wrinkled, but I figured it went with the "distressed" and "rough and tumble" theme of the layout.

Here is the third layout I did featuring the Glitz Bingo Paper. I had this nice number border left over after my last two layouts. So, I kind of tilted it to make a square-in-square effect on the layout.


Even though I love the paper, my favorite part of the layout is this cool rub on also from Glitz. I cut the rub on sheet in half and layered it both under and over the photo.

Oh, why is organizing so hard?

A few weeks ago I mentioned getting my room in better order and cleaning out. This past week I spent a few hours two different days trying to make a mark in there. I've still got a long way to go, but I feel better about the task at hand. The bad news is we may have company next weekend so I can't procrastinate too long - they'll need somewhere to sleep. The good news is I've found lots of things that I really like but haven't used simply because I've forgotten about them!

I have antique furniture in my guest room, which includes a cedar chest, a chest of drawers and a vanity. Right now, every square inch of those three pieces is covered in stuff. I started in the chest of drawers and started throwing things away that I didn't need, or adding them to a box for my sister-in-law to go through. I began sorting within the drawers a bit, but it's hard to sort through a mess. I'm the type of cleaner that needs a clean space to start with - you know, empty drawers or containers or something along those lines. That's how I like to organize. It's rarely how I attempt to organize though!! This time I did clean off the guest bed and start stacking things there. I quickly went through all five drawers on the first day and tossed things that I didn't need (packaging and such) and pulled out things for my sister-in-law and moved things around that I wanted to keep.

The second day I tackled the closet. This is really the worst place. I have a very bad habit of not unpacking bags of stuff. When I go somewhere to scrapbook, I pack up what I want to take and go. Then when I return home, I stick the bag in the closet and forget about it!! Not a good idea. I have several Michaels bags stuck in there as well - things I'd been thinking about looking for but just didn't care enough to look right away.

Now the closet is cleaned out mostly but the bed is covered!! Can you see how I struggle to finish this task? :D

I moved my paper rack into my closet since I don't necessarily need it out in the open. My closet has a light, so I can see inside it very well. I pulled a rack the spins and put it in place of the paper rack. I'm hoping that I can use this to actually display things so I don't forget I have them. I ended up with two empty Cropper Hopper 12x12 paper holders - so I need to find a good and practical use for them.

I'm pretty sure that I'm not the only one that struggles in this area. I'd love to hear your favorite storage idea. How about sharing something you use that isn't typically used for scrapbook storage? Those are the things I really like. I have a hard time spending money on storage items (unless it's a fabulous deal) because that's money I could spend on tools or paper!!! So, I tend to look for things that I can repurpose.

Okay - that's enough chatting. I need to get back to cleaning/purging/organizing!!

lisa

Wednesday, April 7, 2010

My latest Scripts creation


I have had so much fun with this month's kit! I LOVED that it had the raffia in it- and that I had pictures of horses to go with it! I think they go well together. I have several more layouts in the works-- can't wait to finish them up and share them here.

Monday, April 5, 2010

Lots of layouts

I spent a few hours last week just scrapbooking and watching mindless television. I don't get to do that too often - or at least when I do I'm not super productive, I get sidetracked from Brandon and Kelly's on again/off again relationship or get wrapped up in the whole Luke/Loralie thing.

Anyway, last week - I was productive.

I started these first two layouts during Spring Break and finished them up last week. I had photos in mind, but started the layouts without the photos. Usually I let the photos guide me but with this first one - the paper from the Black Bird kit just seemed perfect for the noise going on in the background while I scrapped with my friend, Michelle.


This second layout was inspired by this challenge over at Noel Mignon blog and I used the February Black Bird kit for it, as well. The challenge was titled "Lean on Me" and was about documenting that special relationship, someone you can lean on. So, I made sure to get a picture of me and my friend Michelle. She's that friend - the one that will listen to my craziness and not see it as crazy. She gets me. She has from the beginning of our friendship!! We are a lot alike in so many ways - it's a little weird, actually, but we love it!!


When I got my March Kit - Hey Jude - I couldn't wait to dig in and play. I did this layout with certain photos in mind (which were of Cole petting the animals in Animal Kingdom), but then decided that they wouldn't work (it was December and not really springy). I then thought about taking a picture of Cole outside playing but then wondered if the flashcards at the bottom would make since considering the lack of animals in my photo - so now it's just pictureless and I can't decide what the heck I'm doing here. So, if you have a suggestion, help a girl out.....


Now this one is using really old pictures, I never do that, along with the March kit, Hey Jude. I don't know why I don't use more old pictures since they are just in boxes and not being used at all. I seem to think I can only use photos that have been taken as long as I've been scrapbooking and not from the time before. So, these are from 1997 - while we were living the young and free lifestyle, not too worried about the future yet, not thinking about marriage or kids or anything other than where we'd hang out that weekend. I certainly wasn't too worried about fashion - that's quite apparent by my tucked in tshirt and denim vest!! I recently heard this song "Free" by the Zac Brown Band and loved the chorus and used it as my title.


And finally we have this layout about Cole and what he is, right now, at nine years old. I know we think we'll remember this little silly things about our kids forever. The truth is, we won't remember it all. I'm sure I won't forget his obsession with the Toy Story characters, but I may forget the silly way he says KOOKIE and that face he makes as he says it. I wish I would have thought to do this each year of his life - just a little 'right now' sort of layout. I plan to make sure I do it from now on! And it would be nice to do it with my own 'right now', too.


So, there's not much left of my March kit - so I'm ready to see the April kit! How about you??

Lisa

Sunday, April 4, 2010

A layout---and help needed!

Ok, I am in a bit of a struggle, please see photo:


I made this layout with this month's Scripts Kit, but then, I struggle everytime with how to take a good pic of a 2 12x12 layouts?!

Now, I don't have a fancy schmancy scanner, so that is NOT an option. Who can help? with some tips?

Saturday, April 3, 2010

And the second layout with the Bingo Paper from Glitz


In my last post, I mentioned how much I loved the Bingo paper from Glitz in this month's Scripts Kit. I loved it soooo much that I used it on 3 layouts. Here is the second layout on which I used this fabulous paper.

Now, it's kind of subtle. When I was cutting the grid out of the paper with my craft knife, I cut the star border of the paper off with my craft knife too. I just loved the star border! I also ordered some Dear Lizzy from Lucy (you know she sold some Dear Lizzy kits, right? She does stuff like that from time to time - as well as providing awesome monthly kits. Gotta watch the blog). So, I paired my brand new Dear Lizzy with some elements of the Scripts kit. I am in love with the glitter buttons.
To give the layout some more texture, I used the dyed coffee filter from the kit underneath the star border. I cut it into small strips and gathered it with adhesive on the back side of the star border. Instant texture!


So there you have it! Stay tuned next Saturday for my third layout with the bingo paper!!!

Tuesday, March 30, 2010

100th Birthday!

It is so incredible to know someone that is 100 years old! We celebrated my husband's Grandmother's birthday on Sunday. She turned 100 on March 25th. She has been through so much! Just think of it, she was born in 1910!!! The history she has been through.........it is just amazing to me.

We had a huge party at La Reunion in Helena.....very cute coffee shop! So many friends and family members were there. We wanted to have a record of all those people. Of course, I just pulled out the handy dandy Scripts kit and went to work! I LOVE how it turned out! I used the AccuCut machine to cut out the covers and inside pages for the signature book.
We would love to cut albums for you. Just let us know what you are looking for and we can ship it straight to you!!

Monday, March 29, 2010

Thicker Storage (and all those other alphas, too)

So, I have this bad habit of collecting scrapbook supplies. I'm fairly certain that I'm not the only one. My scrap supplies are taking up residence in my guest room. My guest room is also full of laundry! All my clean laundry is sorted and stacked nice and neatly (well, mostly neatly) on the guest bed. This is just out of control. I can't find my supplies. I can't find my favorite jeans. Cole can't find his favorite pj's. IT'S JUST TOO MUCH.

I think the best way to tackle this problem is first - to get rid of the laundry. Put everything away after it's folded - not just leave it there forever. And then second - I need to find a way to organize my favorite things - the things I use the most and go to over and over. I've decided these things are:

my kits
my paper
my letters
my go to embellishments
my tools

Now, I need to weed out everything else. I'm not sure how I'm going to do that - but I'm going to really really make some drastic changes in my guest room this week!!

In my attempt to organize my favorite things, I thought I would cook up some storage for my letters. This is what I came up with:


I found this fabulous cereal of Target. It's so good, I could seriously eat it for breakfast, lunch and dinner, seven days a week. It's just that good. But what makes it better - the container is so cute. It's harder cardboard than a regular cereal box and it has a plastic top - instead of just the typical cardboard fold up top.

I used the February BlackBird kit and covered my box and added some embellishments to the front and a label with THICKERS, as well.


Now I need to make a few more with my faves. I'm not sure if I'm going to do this by brands, though - I mean I have enough Thickers to fill up more than one container but the rest of my sticker letters are cardstock stickers and much thinner so I think I'll just group them all together. I can't wait to make a few more and have my letters a little more organized.

Now, if only I could find super easy ways to organize the rest...................

Lisa

Sunday, March 28, 2010

It's Hidden!


Loving this month's kit. When I picked my kit up this month, this bingo paper from Glitz was the first thing I noticed. Perfect for some great boy pages...which is exactly what I've been wanting to scrap.

I loved the grid pattern of the paper, and it gave me an idea. I pulled out my exacto knife and did some cutting. I cut a big section out of the middle of the paper (and saved the rest. I used this paper on two more layouts. I love the versatility, but I digress). Then, using the grid pattern as a guide, I cut a little flap a little right of center.

I don't know if you can tell from this photo, but I also put a coat of the Copper Glimmer Mist from this month's kit on the paper to give it a little oomph.

Then, I backed the opening left by the flap with some notebook paper (lined - easier to write my journaling on). I used one of the Jillibean soup tab stickers as a little lift for the flap.


So easy and just a little bit different from your usual journaling spots.

Saturday, March 27, 2010

The Happiest Race on Earth!


What fun I had with this month's kit! Why, oh why am I just now using these Tiny Alphas from Glitz Design?! They are the cutest!

I love this photo. I could scrap it again and again! I know this layout is kind of "plain" but that is intentional! The photo says it all!!!

**My challenge to you....get your Happy Photo...and make something with it!

Wednesday, March 24, 2010

Color Combination Challenge!

When certain colors are mentioned together or used together, our minds usually think of a particular holiday or occasion, such as red and green for Christmas, black and orange for Halloween, or pastel pink for a baby girl. My challenge to you is to use a color combination that is usually associated with a holiday or special occasion on a layout or project for something else. In my example, I used red and green for a layout about a game the kids made up and played while we were on vacation in Florida. They didn't have a name for it, so I called it "The Random Game".
Once you have created your layout or project, let us see it by posting a link in the comments and I will send a prize to one lucky winner! Become our fan on Facebook and I will put your name in the drawing twice!! If you are already a fan, let me know, and I will put your name in twice as well. I will draw a name on April 7th-- that gives you two whole weeks to come up with an idea. Can't wait to see what you do. Try to use product from the Scripts Kits-- any month, or months! It doesn't all have to be from the kits, but try to make at least half of your layout/project from Scripts. We love to see what you create!


Tuesday, March 23, 2010

Cookies Jars in the Springtime!

I needed to spruce up my cookie jar for Spring. I have this really cool jar that has black and white polka dots all over it. You may have seen them at The Spotted Zebra in Trussville! They are made by Coton Colors. This company has the cutest stuff! I wish I had every piece of pottery. It's just all so colorful!

So, I have several attachments for my cookie jar. Each season you can change out what attachment you use. My collection consists of all Fall attachments?! Odd.....I have a School Bus, a Witch, a Turkey (so cute), and a Christmas Tree. I do not know why I haven't bought something for Spring or Summer. I guess I need to head out to The Spotted Zebra to get one! OR.......make one out of the newest kit!!!!
Brittney was over this morning and I was showing her how cute it is. She made the suggestion that I make a new attachment...hello! Great idea.

I ran downstairs, cut out a scalloped circle from the AccuCut machine, a few flowers, used a butterfly from last month's kit and voila...the perfect Spring attachment!